First, I would like to apologize for the delay in posting wedding photos to the blog. Because there are so many, and they are so large, they take a long time to upload... so, I will be posting them in phases. Please check back for more photos. Also, if you have photos from the wedding that you would be willing to share, I would LOVE to get them from you!
I absolutely LOVE how everything at my and Joe's wedding turned out. The wedding was totally us, and that is all thanks to amazing helpers/make things happeners, the wedding came together just as I had hoped and included lots of little things that made the day extra special.
Entry to Welcome Hall

The hall itself was amazing (so was the weather, thank you Jesus). Welcome Hall was built in 1899 and usually hosts things in the realm of cattle rides. The building is not air conditioned but is surrounded by great windows on all sides that can be propped open.

 My mom handmade pinwheels to give to all the kids during the wedding. We also had large pinwheels in the ground as decoration.


Paper cones were made out of scrapbook paper, filled with rose petals, and placed on each of the chairs before the wedding. 
 These table runners were made of upholstery fabric I found on Craigslist. My AMAZING aunt Marilyn sewed each of these runners for us.

Hankies were passed out to the ladies that attended for their "Tears of Joy". Every one of these hankies came from estate sales. While collecting these over the past year, please were incredibly generous and would frequently give me their grandmothers/mothers/other loved one's hankies because they found out what I was doing with them.

As guest arrived to the wedding we had some yummy homemade cookies and lemonade for everyone to enjoy. Its was apparently a big hit with the ring bearer and flower girls just before their walk up the aisle. (Thanks PMS crew!)


Mason jars with candles were hung from the huge oak trees.

We had a section for "Love Notes for the Newlyweds". We got great notes, tips, and tons of encouragement from friends and family here.


Rather than using all cut flowers (that would be useless after the wedding), we used a lot of potted plants on tables and as decoration around the hall (in addition to the cut flowers).

The entry to hall.

Haley at the
Muffin Top Shop made and decorated our cake table. It looked beautiful and it was way better than anything I could have created. The cake/cupcakes were delicous. We also had bumbleberry pies (mix of blackberry, strawberry, blueberry, rasberry, and Rhubarb) from a local (Conroe local) shop called Pie in the Sky. This is a favorite of both mine and Joe's so they were a must have at the wedding.


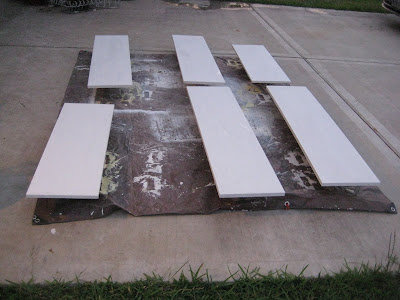
 I put 2 coats of polycryic (probably should have done three through), then Joe had some spare time and hung the shelves in the closet.


 I have been looking for a piece like this will all the design and carvings to try out my new glazing process. I got this technique from


 On the big, flat areas I used a much bigger brush of course.


